Now I have the cross member in and this is the final fitting of the inner floor before welding in tomorrow.
Saturday, 14 December 2013
Friday, 13 December 2013
Lamborghini Urraco P250 rear suspension and brake rebuild
As a break from body work I stripped, cleaned, painted and reassembled the passenger side (RHD) rear suspension.
Discs are in good condition with minimal wear. Centres cleaned up and painted.
Rear hub carrier is cleaned, painted and reattached to the swinging arm. The lower pivot is a large king pin with bushes inside the hub casting. All was in excellent condition.
Rear brakes rebuilt using BMW 1602 seal kit. Pistons were fine.
Discs are in good condition with minimal wear. Centres cleaned up and painted.
Tuesday, 10 December 2013
Lamborghini Urraco P250 front valance repair - part 2
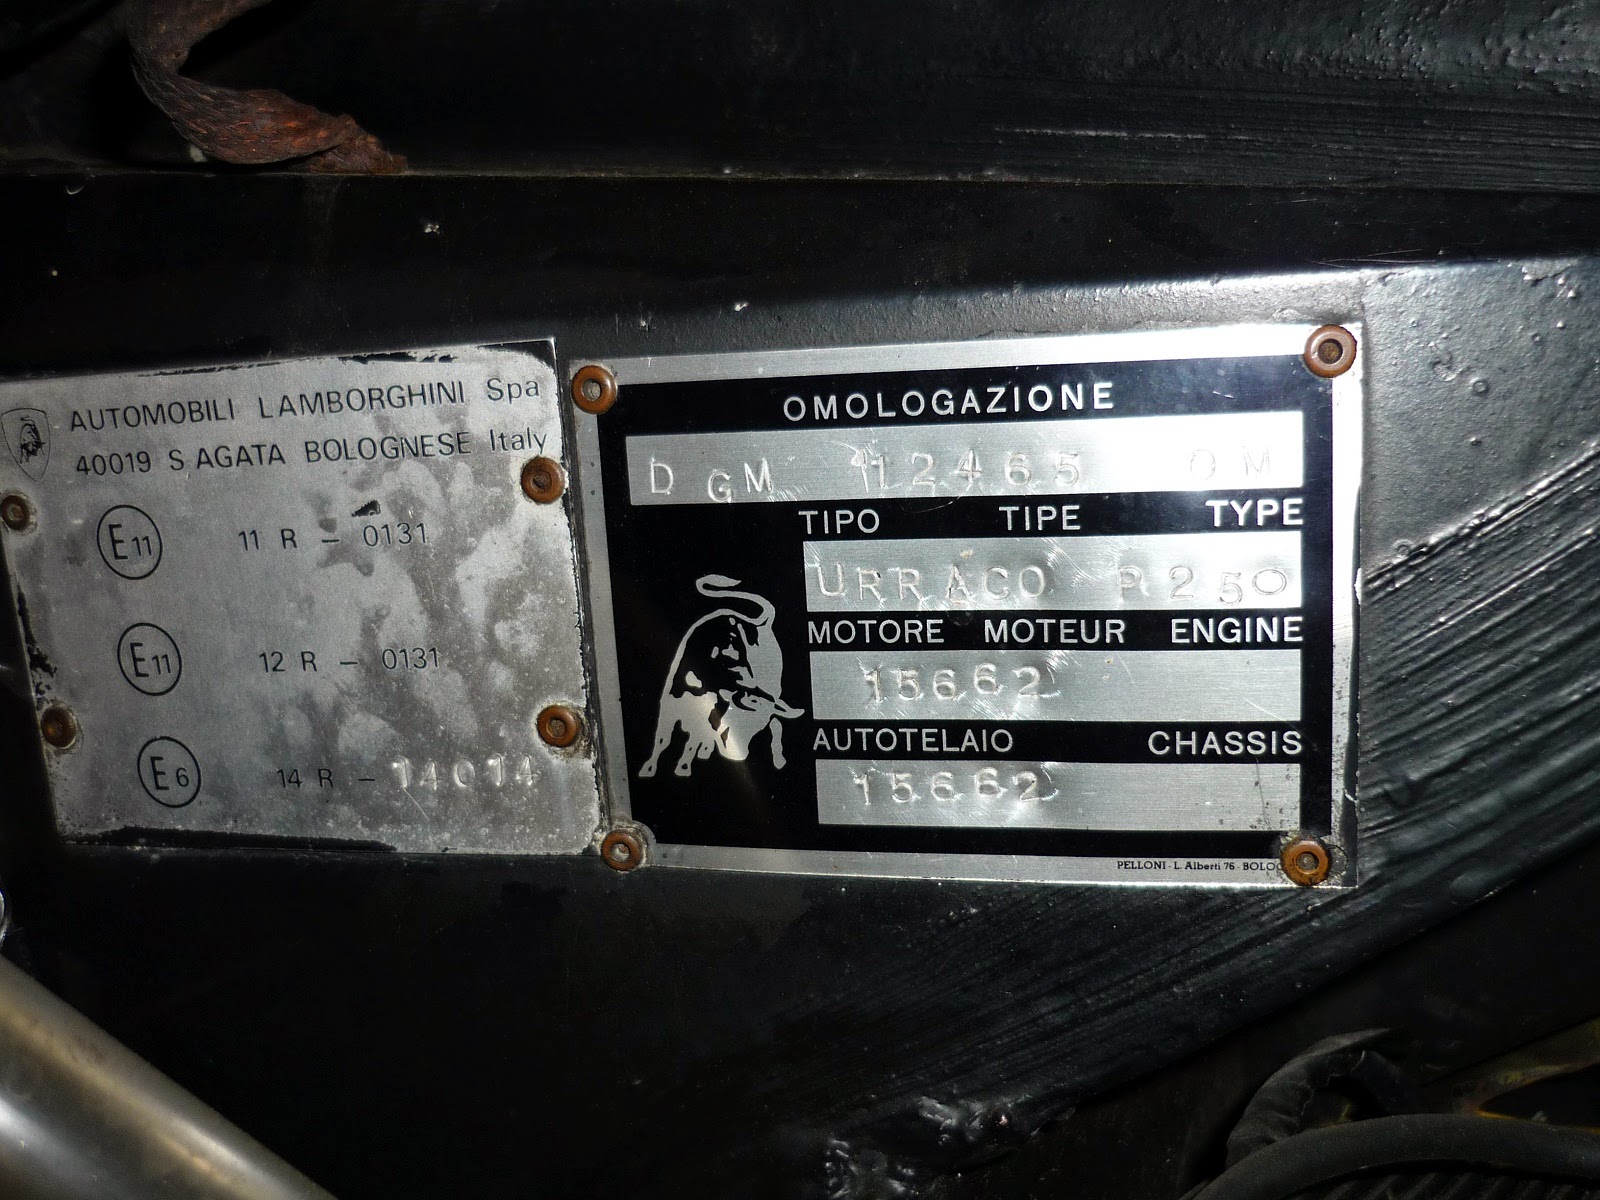
I cannot save the original beam but have the section with the number (Lamborghini * 15662) on so took advice from VOSA and the Police in the UK. They said I just need to document with photos and reattached the original number section to the newly fitted body pieces.
New front floor section fabricated with new cross beams copied off the originals which were beyond repair. Box section test fit.
The front of this car will be perfect and all metal when finished.
Wednesday, 4 December 2013
Lamborghini Urraco P250 front valance repair - part 1
I knew the front end of my car had covered up rust issues - the rest of the car is really good. So I decided to get stuck in.
The lower valance had been paneled over with that looks like the remains of some other car
and that whole area was full of repair patches done badly.
The lower valance had been paneled over with that looks like the remains of some other car
So have many grinding discs I've got back to solid metal throughout.
I had to remove the radiator and wiring loom and of course bumper and lights.
I think the pictures make it look worse than it actually is. OK there's going to be a fair amount of new metal going in - but the car will be totally rust free up front once I've finished. I think most Urracos will have issues around here as the lower centre valance piece if a double skin so a bad moisture trap.
Wednesday, 20 November 2013
Lamborghini Urraco P250 ATE BMW 2002 front brake calliper rebuild
Urraco P250 front brake callipers (ATE similar to those fitted BMW 2002) are dry but each piston has rust residue on, usually caused by the section of calliper forward of the hydraulic seal which rusts. It shouldn't as each piston has a rubber dust/moisture seal, but most people don't add rubber grease behind the seal to help prevent moisture sitting between the calliper and housing.
With the hydraulics still attached, push each piston nearly all the way out by clamping the other three at various stages.
Calliper removed use compressed air to push them out the last bit. Be careful!
You can see the ring of rust on the calliper body which is beyond the hydraulic seal (removed). It's expansion is usually the cause of seizure x 4 pistons per calliper = stiff brakes that don't freely return.
A careful trim with a Dremel to clean the rust off has the diameter back to normal. Compressed air and brake cleaner to clean off the resulting dust.
The pistons on this calliper were perfect after cleaning off rust residue. Main ring seals back into the cleaned up calliper.
A drop of brake fluid spread around the calliper and pushed back in by hand. Add red rubber grease around the exposed part of the piston and push it back all the way. Refit the old or new dust seals and it's ready for refitting to the car following a degrease and repaint in Hammerite smooth silver.
Friday, 15 November 2013
Lamborghini Urraco P250 suspension rebuild
I appear to have taken my Lamborghini apart.. I'm detailing up the suspension and fixing some knocks at the front end. The factory "don't remember" where they sourced some of the suspension components from and they didn't write stuff down in the 70's, so it's an extra fun challenge trying to renew parts Turns out Volvo 240 (brick) suspension tops are similar and the front brakes are ATE BMW 2002 4-pot (40mm pistons) as fitted to the Turbo models but with a space to accommodate vented discs on the Urraco
Tuesday, 5 November 2013
Urraco P250 rear suspension and hub re-assemble
So with the hub and strut dismantled I set about cleaning things up. The lower part of the hub carrier mounts to the rear suspension arm with a simple long king-pin design. It was all in good condition with no wear on the kingpin or bushes, but either end is sealed by these discs which are like mini-pistons and have three sprung piston-rings to provide the seal. One was ok, the other the rings were seized.
After a good soaking and cleaning the sealing rings freed up. I cleaned everything up and painted the solid disc for protection.
Here you can see the rear suspension arm and where the hub carrier lower pivot king-pin mounts.
And the cleaned up parts, kingpin, thrust washers, sealing rings and big suspension bolt!
With the hub carrier cleaned up and painted, king-pin reassembled and greased from the bottom (on it's side for access in this photo). The bolt inserted just to keep the sealing plates in place whilst greasing.
Cleaned and painted strut re-assembled and back in the place. I used the original strut top mount which actually seems to be in good condition. Spring was media blasted and painted in a close match to the original green.
View of the cleaned and painted hub carried bolted up. You can see the handbrake cable mounting lug - all very simple.
Subscribe to:
Posts (Atom)